


How to Make Microwavable Hand Warmers at Home
-
A microwavable hand warmer can feel mild on the outside while the filling is much hotter in one spot. Microwave ovens heat unevenly, which is why USDA microwave guidance emphasizes rearranging contents and allowing standing time. For a fabric warmer, that means the pouch, filling, and heating routine all matter.
Learning how to make microwavable hand warmers starts with a simple sewing project, but it shouldn't end with a guessed microwave time. Make a flexible, leak-resistant pouch, choose a dry filling, and recognize that a homemade design doesn't come with a validated heating limit. The aim is gentle hand warmth, not the hottest pack you can tolerate.
Table of Contents
- Fabric Size and Fill for One Pair
- Sew and No-Sew Assembly Steps
- A Short-Burst Microwave Routine
- Care Storage and Stop Signs
- Keep the DIY Pair or Switch to a Made Warmer
Fabric Size and Fill for One Pair
A small, loosely filled pouch is easier to flatten and redistribute than a tightly stuffed square. Leave enough space for the filling to move when you gently squeeze it. A packed pouch makes it harder to break up a concentrated pocket of hot material.
For a hypothetical palm-sized sewing pattern, you could cut four cotton rectangles measuring five by seven inches. A half-inch seam allowance would produce a pair of pouches approximately four by six inches. Those dimensions describe a sewing example, not a tested heating design or an approved fill capacity.
Choose tightly woven cotton or cotton flannel with a known fiber composition. Check the thread and any trim, too. A cotton-looking fabric can still contain synthetic fibers, metallic decoration, or finishes that aren't appropriate for microwave use.
Choose the fill before cutting
Flaxseed and plain white rice are practical dry-fill candidates, but they aren't interchangeable heating recipes. Flaxseed contains oil, while rice gradually dehydrates with repeated use. Neither characteristic establishes a safe microwave time or a guaranteed service life.
Lava sand and fine lava pellets need a different decision. Their weight and particle size affect the shell, and a material sold for landscaping or decoration isn't automatically suitable for microwave heating. Unless the supplier explicitly identifies the material for that use and provides compatible heating guidance, leave it out of a homemade warmer.
Shell and fill amounts for one hand warmer
| Material | Amount per warmer | Heat behavior | Best when | Watch-outs |
|---|---|---|---|---|
| Cotton flannel or tight cotton shell | Two matching panels per warmer, four per pair | Contains the filling but doesn't eliminate hot spots | A sewn build with known microwave-compatible materials | No metal, foil, plastic trim, or unknown finishes |
| Flaxseed | Enough to leave the pouch loose, flat, and easy to knead; weigh and record the finished unit | Oil-containing seed that remains movable when dry and sound | A flexible seed-filled pouch | Reject burnt, rancid, damp, or clumped filling |
| Lava sand or fine lava pellets | Use only a supplier-approved fill quantity for a microwave-compatible design | Mineral fill needs its own heating validation | A design with explicit material and heating specifications | Don't substitute landscaping material or assume grain-pack timing applies |
| White rice | Enough to leave room for redistribution; don't compress it into the corners | Provides dry-fill warmth but can dehydrate during reuse | A simple pantry-material prototype | Check for dust, persistent clumps, and changed odor |
Keep the ingredients simple
Use one filling, not a mixture of rice, seed, and mineral particles. A mixed pouch makes it harder to identify what changed if it begins smelling different or developing clumps. It also makes your next pouch harder to reproduce.
Skip essential oils and dried fragrance additions in a first build. They introduce extra ingredients without establishing how the finished pouch behaves under heat. An unscented pouch also makes a new burning or musty smell easier to notice.
For examples of how reusable fabric packs differ in construction, our microwave warming bag guide offers useful context. Choose the shell and filling together before shopping, rather than buying seed first and forcing it into whatever fabric is available.
Practical rule: Fill for movement, not firmness. If you can't spread the contents into an even layer, remove some before closing the pouch.
Sew and No-Sew Assembly Steps
The sewn version provides a more dependable closure than a tied sock. Neither version becomes microwave-safe just because it holds together, though. Construction checks and heating validation are separate jobs.
Some heat packs exceeded 150°C internally during Australian Therapeutic Goods Administration laboratory testing. That finding is a reason to take internal heat seriously, not a temperature to approach in home testing.
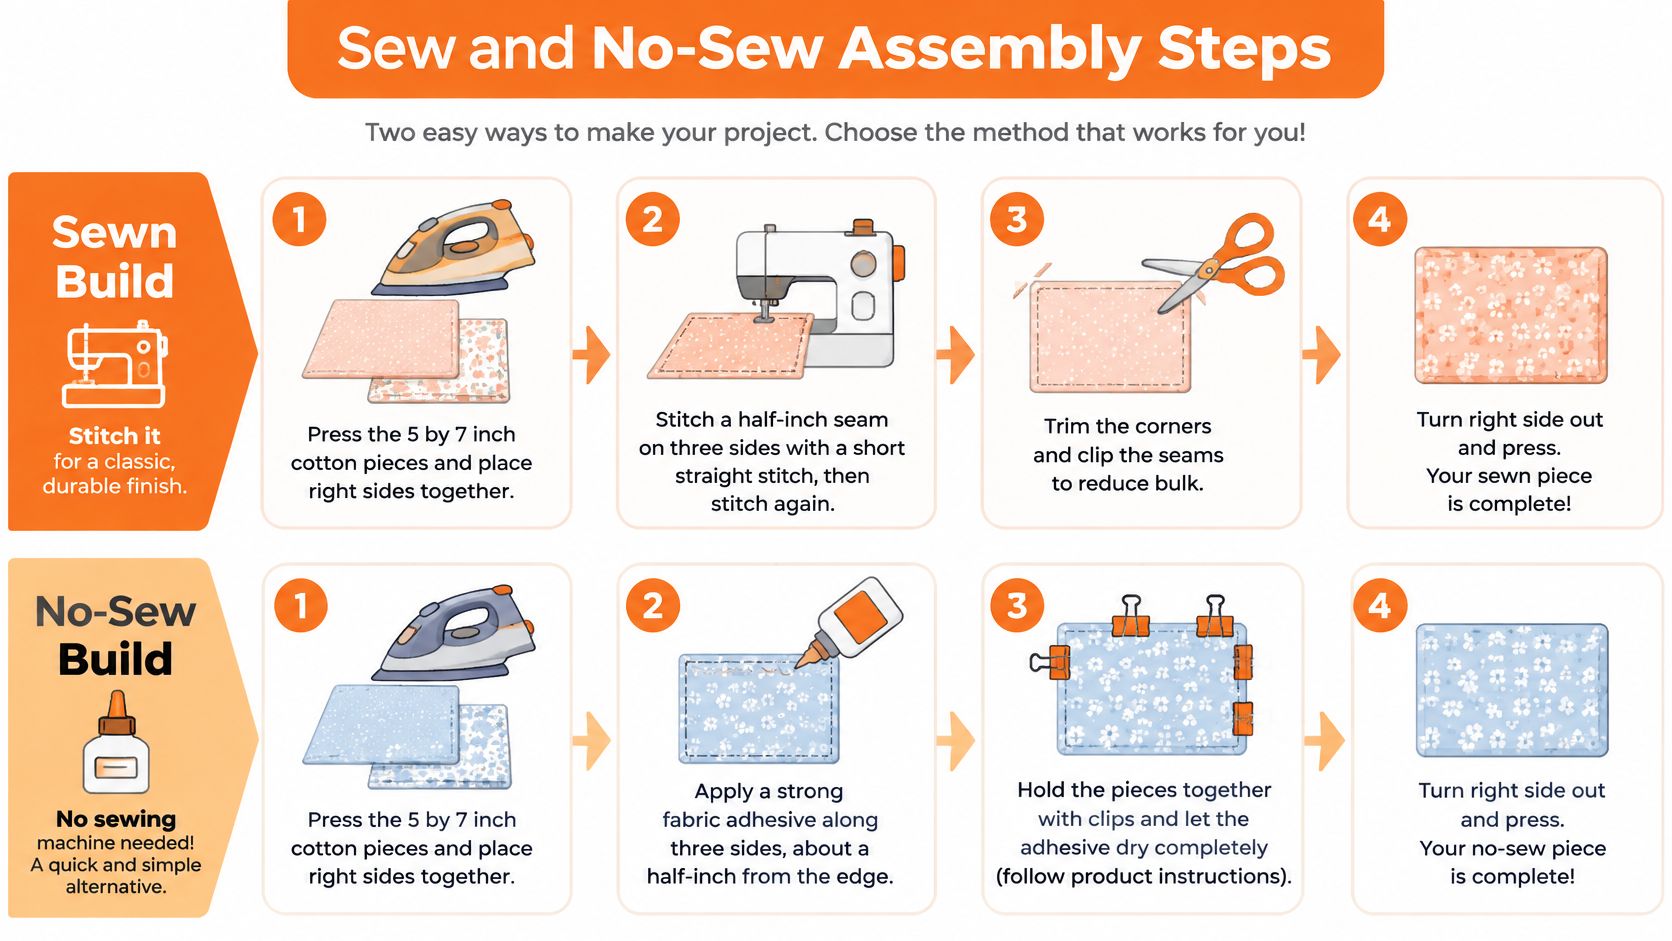
The assembly illustration shows the two construction paths.
Sewn build
- Prepare the panels. Wash and dry the empty fabric if its care instructions allow, then press it flat. Cut matching panels using your chosen pattern and place their right sides together.
- Sew the perimeter. Stitch the sides and bottom with a short straight stitch, leaving the top open. Add a reinforcing row close to the original seam, keeping both rows within sound fabric.
- Turn and inspect. Trim excess corner fabric without cutting into the stitching. Turn the pouch right side out and inspect the corners for gaps or loose thread.
- Add compartments before filling. If you're making separate channels, stitch the dividing lines while the shell is empty. Leave each channel accessible from the open top so you can distribute the filling consistently.
- Funnel in the dry fill. Use a paper funnel or a clean kitchen funnel. Keep particles out of the seam allowance and leave the pouch flexible rather than tightly packed.
- Close the opening. Fold the raw edges inward, pin or clip the fold, and topstitch across it. Reinforce the closure and secure the thread ends. This closing seam deserves particular attention because loose grains can interfere with the stitches.
- Leak-test over a tray. Turn, shake, and gently squeeze the cold pouch. Check every seam, especially the closing seam and channel openings, for escaping particles.
If you're unfamiliar with aligning cotton pieces and keeping seam allowances consistent, The Fabric Company's quilting guide for precut beginners provides related fabric-handling practice. Use those sewing skills without adding quilt batting, decorative hardware, or extra layers to this pouch.
No-sew build
- Check the entire sock or sleeve. Use known microwave-compatible cotton fabric. Don't assume that a cotton sock has cotton elastic, cuff threads, or decorative details.
- Add a modest amount of dry filling. Leave ample empty fabric above it for a secure closure. The filled area should flatten without forcing grains into the opening.
- Make a fabric-only closure. Tie a secure knot in the fabric, or fold the opening and secure it with cotton tape. Don't use a metal clip, rubber band, or plastic fastener.
- Test the knot over a tray. Invert and gently squeeze the pouch. The sock knot or folded opening is the likely leak point, so reject any closure that loosens during handling.
Treat the no-sew version as a temporary construction, not an equivalent replacement for a reinforced daily-use pouch. If you can't verify its materials or keep the closure secure, don't microwave it.
A Short-Burst Microwave Routine
One fixed microwave time isn't a safe instruction for every homemade pouch. Oven output, fill weight, starting temperature, moisture, and pouch shape all affect the result. A brief interval is still capable of overheating an unsuitable or unusually dry filling.
The Organized 31 rice-pack tutorial illustrates the familiar DIY approach, but a general craft tutorial can't establish the safe limit for every oven and homemade design. A useful routine needs a known ceiling, not just permission to keep adding time.
The visual below highlights why wattage belongs in your heating record.
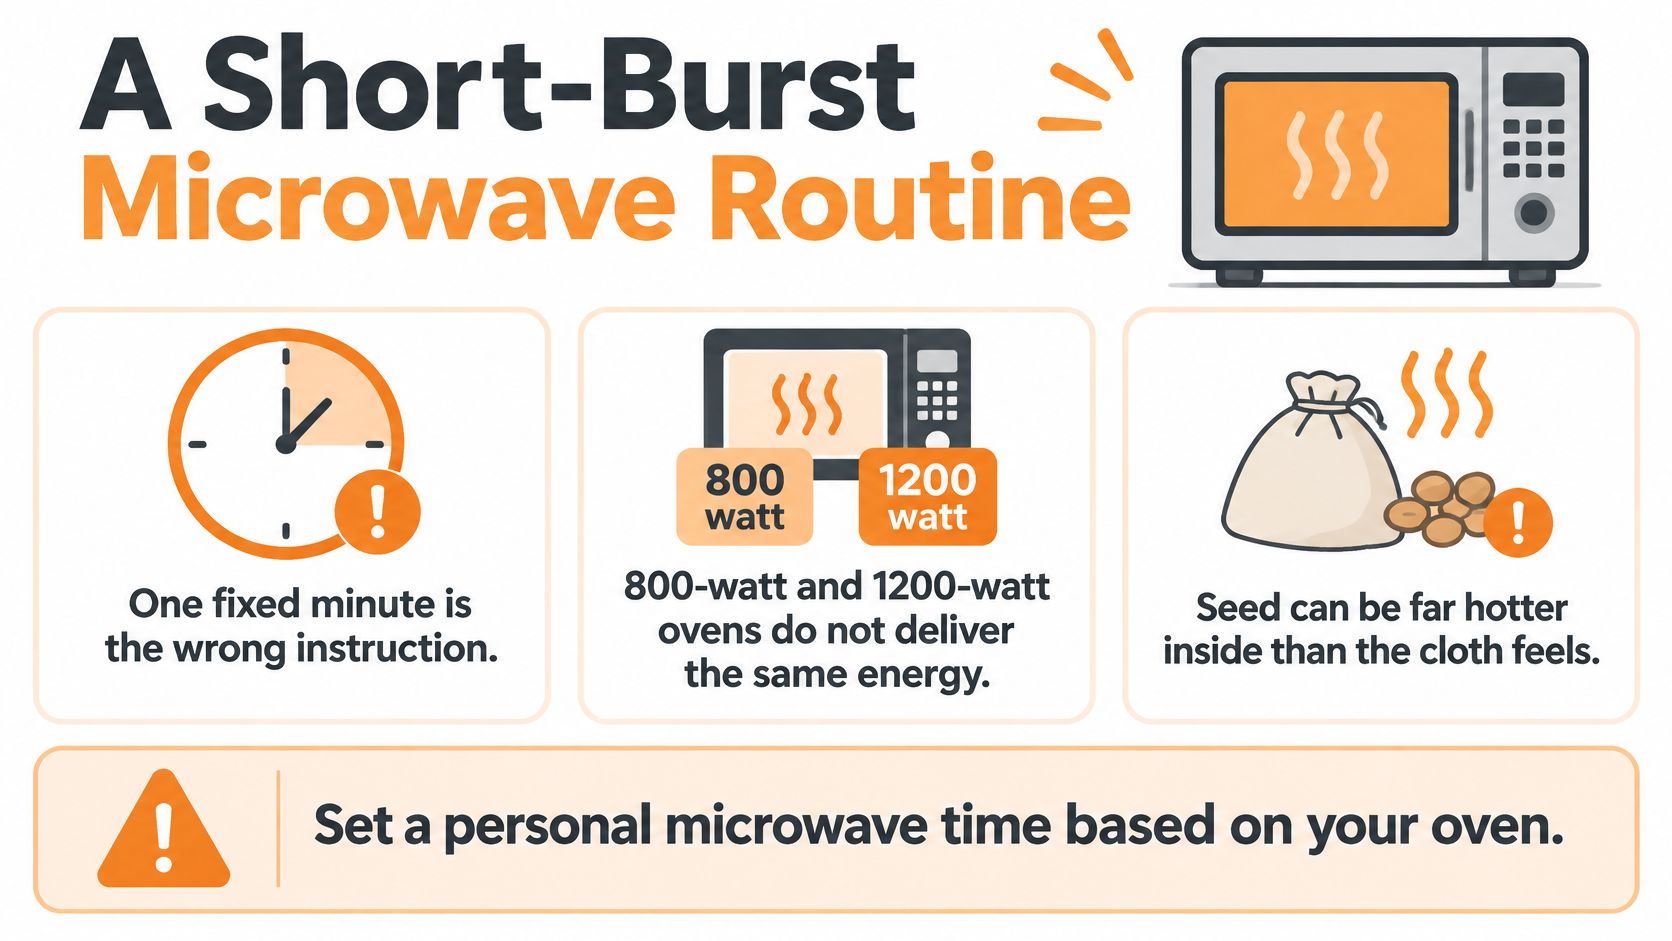
Use wattage to identify the protocol, not invent one
The available guidance doesn't establish safe numerical burst lengths or total-time limits for this homemade pattern. Publishing a wattage table with guessed seconds would make those guesses look tested.
Use the table as a stop-by checklist instead. If you don't have a validated limit for your exact design, that's the stopping point before heating, not a reason to experiment until the pouch feels hot.
Starting bursts by microwave wattage
| Microwave | First burst | Added bursts | Stop by | After heating |
|---|---|---|---|---|
| Lower-output oven, confirmed from its label | Use only a burst validated for the exact pouch and fill | Only as the matching protocol permits | The validated cumulative limit, or earlier for any warning sign | Redistribute, check, and allow the specified standing time |
| Mid-output oven, confirmed from its label | Match the protocol to the stated output | Don't borrow intervals from another design | The validated cumulative limit, even if warmth seems modest | Use a fabric barrier and check multiple areas |
| Higher-output oven, confirmed from its label | Use a specifically compatible protocol | Don't scale another oven's timing by guesswork | The validated cumulative limit; stop earlier if heating is uneven | Keep the pouch uncovered while it settles |
| Unknown wattage | Don't begin heating | None until output and compatible instructions are known | Stop before starting | Find the manual or choose a labeled warmer |
Follow a repeatable sequence
- Identify the oven and pouch. Find the microwave's output wattage in its manual or label. Record the finished pouch weight, filling, and construction so you don't confuse it with a different warmer.
- Prepare the oven. Use a clean turntable, lay the pouch flat, and keep it away from the cavity walls. Include a microwave-safe cup of water when the applicable heat-pack instructions call for it.
- Stay beside the oven. Heat only under the matching validated protocol. Don't leave to finish another task.
- Remove and redistribute carefully. Use a towel if necessary, then gently move the filling without pressing a potentially hot pouch against bare skin.
- Check more than the middle. An infrared thermometer can compare surface readings at the center, edges, and ends. It can't measure the internal seed temperature through the fabric, so an acceptable surface reading isn't proof that the filling is safe.
- Stop rather than chase heat. Don't exceed the established ceiling because the cloth feels lukewarm. Allow the specified standing time on a noncombustible surface before use.
A comfortable wrist check is a final precaution, not a substitute for validated heating instructions.
Our microwave heating safety guide provides additional context for handling reusable heat products. People with reduced sensation shouldn't use touch alone to judge safety or begin a homemade heat-therapy routine without clinical advice.
For a visual companion, the following video is available. Any demonstration still needs to be checked against the instructions for the actual warmer.
Care Storage and Stop Signs
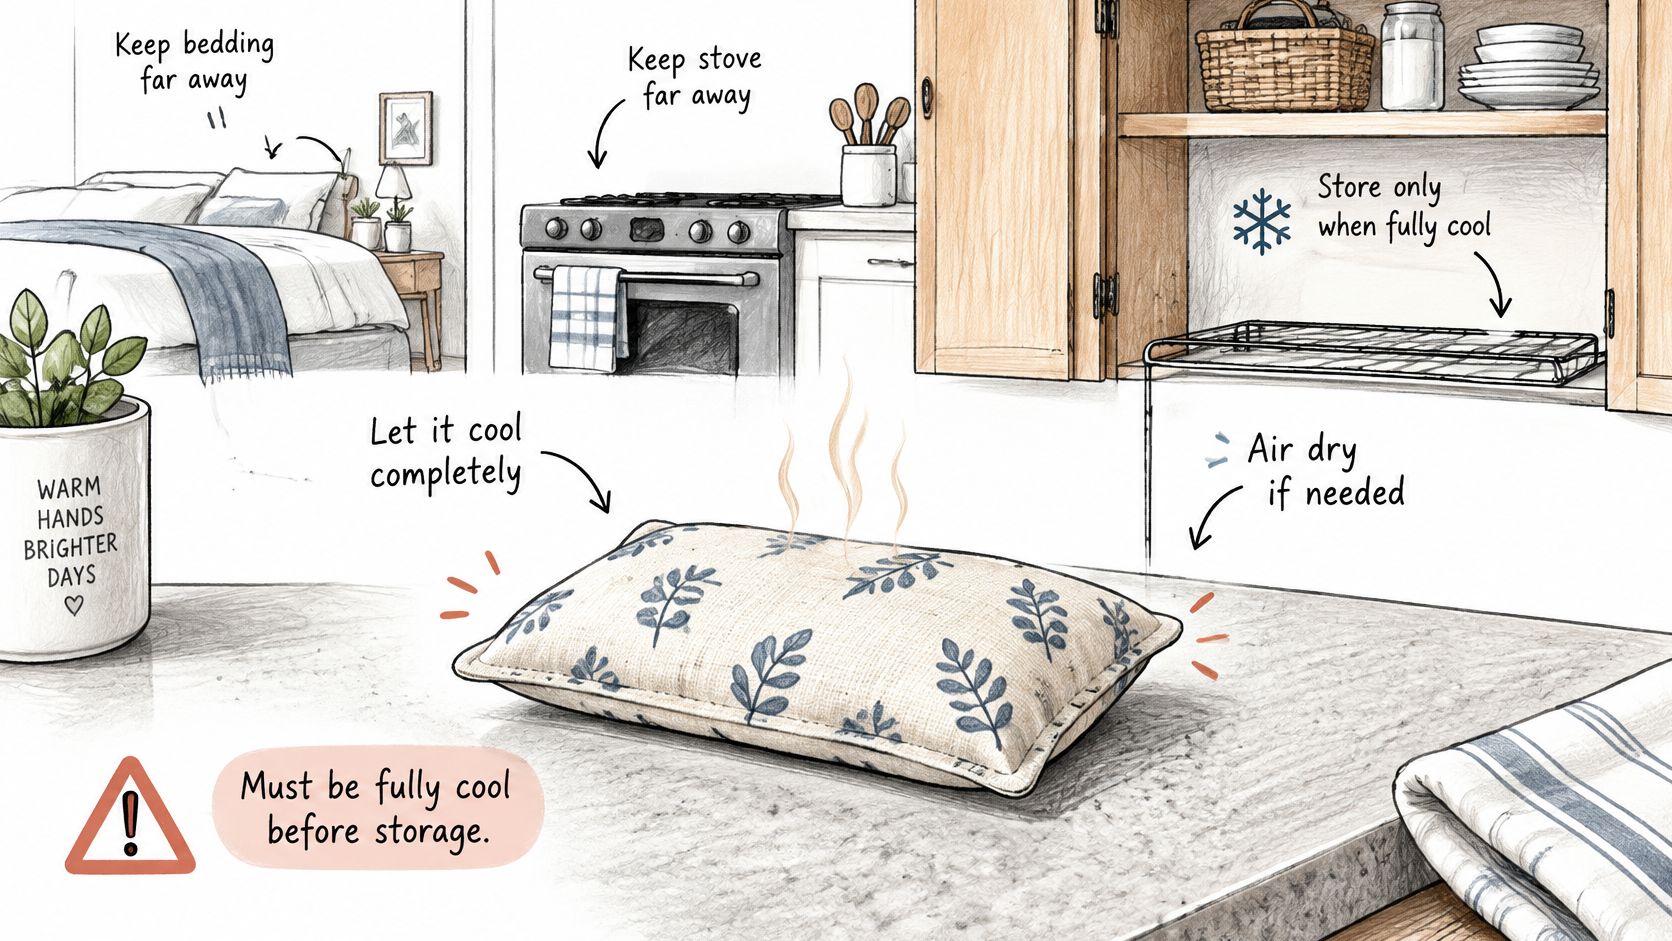
After use, let the warmer cool completely on a hard, noncombustible surface before storing it. Choose a dry cupboard away from the stove, bedding, and places where someone might accidentally cover a warm pouch.
NSW consumer-safety guidance identifies overheating, reheating before complete cooling, and heat trapped in bedding as fire hazards. Don't use a grain-filled warmer in bed, under blankets, or while sleeping.
Keep the basic cooling and storage reminders near the place where you use the warmer.
Keep washing water out of the filling
A removable outer cover is easier to clean than a permanently filled pouch. Wash that cover separately according to its fabric care instructions, and put it back only when it's completely dry.
For the filled pouch, use a barely damp cloth on the cold exterior rather than soaking it. Don't scrub a seam until water passes through to the grain. Microwaving isn't a drying or sanitizing method for a wet warmer.
If a spill, heavy perspiration, or washing wets the filling, take the pouch out of service. Discard the affected filling rather than trying to restore it with extra microwave cycles. If the shell is musty, stained, or difficult to clean thoroughly, replace it too.
Inspect by condition, not by calendar
The JenniferMaker reusable hand-warmer tutorial discusses rice dehydration and flaxseed's oil content, but it doesn't establish a validated replacement schedule. Don't turn those material differences into a promise that one filling lasts a particular number of months.
Instead, inspect the cold pouch before each use. Compare it with its original condition: how freely the filling moves, how the fabric looks, and whether its smell has changed. Fragrance shouldn't be used to cover up a new odor.
Hand warmer problems and what to do
| What you notice | Likely cause | Do this |
|---|---|---|
| One corner too hot to hold | Concentrated filling or excessive heating | Stop using it, cool completely, and reassess the design and heating protocol |
| Burning smell, smoke, or brown spot | Overheated filling or fabric | Stop heating; retire the pouch once it's safe to handle |
| Spark in the microwave | Possible metal contamination or another unsuitable component | Stop the oven; don't heat that pouch again |
| Musty or wet shell | Spill, perspiration, washing, or damp storage | Discard affected fill; don't microwave it dry |
| Seed leaking from a seam | Damaged stitching, worn fabric, or an insecure closure | Take it out of service; rebuild rather than tape |
| Still warm from the previous use | Incomplete cooling | Don't reheat; wait until completely cool and follow the applicable cooling instructions |
A hot corner without visible damage is a warning to investigate, not proof that kneading alone will fix the problem. If the same area repeatedly overheats, retire that design. Repeatedly trying it at slightly different times isn't a reliable safety test.
Use a firm retirement checklist
- Smell. Reject a new burnt, rancid, or musty odor. Don't add lavender or essential oil to hide it.
- Clumps. Retire filling with a stiff lump that won't redistribute gently. Don't crush the lump and assume the original heating behavior has returned.
- Scorching. Browned fabric, charred particles, or heat-stiffened areas mean the pouch shouldn't be reheated.
- Seams. Escaping grains, frayed corners, or separating stitches require reconstruction, not tape or adhesive.
- Moisture. A damp interior or suspected mold ends the filling's use, even if the outside later feels dry.
Retirement rule: Don't reheat a suspicious pouch to see whether the smell happens again.
If smoke appears inside the microwave, stop the oven and keep the door closed. Switch off or disconnect power only if it's safe, and follow emergency guidance if fire persists. Don't carry a smoking pouch through the house or open the door to inspect it.
For ordinary, nonsmoking cooling, use the noncombustible surface you prepared before heating. Keep children and pets away until the pouch is cold. Disposal should happen only after the material no longer presents a heat or ignition hazard.
Keep the DIY Pair or Switch to a Made Warmer
Keep the homemade pair only if the construction and heating instructions both stand up to scrutiny. A tidy seam is useful, but it doesn't establish a safe maximum heating time. Dry filling and an odor-free test aren't enough to prove a design safe for indefinite reuse.
A DIY pouch can suit someone who enjoys making and maintaining household items and understands its limitations. It isn't the best choice for someone who wants to press a microwave button without checking which pouch, oven, and instructions they're using.
Rebuild when the construction is the problem
A loose closure, uneven compartments, or fabric that lets small particles escape calls for a better shell. Replace the damaged parts completely rather than adding a patch over a weakened area.
Changing rice to flaxseed also changes the warmer. Don't carry over the old heating record as though only the texture changed. Likewise, making a larger pouch or adding more filling creates a different heating design.
- Keep it. The materials are known, the pouch remains sound, and a validated protocol applies to that exact construction.
- Rebuild it. The closure or shell isn't dependable, but you can correct the construction without reusing suspect filling.
- Switch it. You need product-specific heating directions and don't want to develop a homemade design.
Choose a labeled warmer when guessing isn't appropriate
A ready-made warmer removes the fill-measuring and seam-building steps. It should still be checked for approved microwave wattage, maximum heating time, cooling requirements, and cleaning instructions. Commercial construction doesn't remove the need for careful use.
For someone with neuropathy, poor circulation, or another cause of reduced sensation, buying a warmer isn't by itself the safety solution. Ask a clinician whether heat is appropriate and what precautions are needed before choosing either route.
Our Size Small Microwavable Hand Warmers are odorless, washable gloves that warm fingers. The hand-warming glove overview can help you consider that format against a small homemade pouch; follow the actual product's heating and washing directions rather than transferring DIY instructions to it.
Keep the warmer's instructions with it. A family member who didn't make the pouch shouldn't have to guess what's inside or how it should be handled.
SunnyBay offers reusable microwavable hand warmers and glove-style options for warming fingers without sewing and filling a pouch yourself. Visit SunnyBay to explore the available designs, then check the heating and care instructions for the warmer you choose.


