


Natural Ways to Treat Tendonitis for Lasting Relief
-
Natural treatments for tendonitis are all about helping your body do what it does best: heal itself. By using simple, effective strategies like heat therapy, massage, and targeted exercises, we can reduce pain, calm inflammation, and start rebuilding the tendon for a real, lasting recovery.
Understanding Tendonitis and Why Natural Healing Works
Before jumping into the "how-to," it helps to understand what's actually going on inside your body. Tendonitis rarely pops up out of nowhere. It’s typically the end result of repetitive stress that creates tiny micro-tears and irritation in a tendon, kicking off an inflammatory response.
Think of a rope being rubbed over the same rough edge again and again. Eventually, it starts to fray. That's a great way to picture what happens to a tendon stressed by repetitive motions from activities like typing, running, or lifting. This slow, cumulative damage is what brings on that all-too-familiar ache, stiffness, and weakness. For a closer look at how this plays out in a specific area, this piece on tendonitis on top of the foot offers some great insights.
The Power of Supporting Your Body's Repair System
Instead of just silencing the pain with a pill, natural approaches work with your body’s built-in repair system. It's like giving a construction crew the right tools, materials, and a bit of quiet time to properly fix a damaged building. The goal is to create the perfect environment for healing to happen.

Natural treatments for tendonitis really boil down to a few key principles:
- Reducing Inflammation: The very first step is to calm down the aggravated tissue. This is where smart rest and anti-inflammatory foods can make a huge difference.
- Boosting Blood Flow: Good circulation acts like a super-efficient delivery service, bringing fresh oxygen and nutrients to the tendon while clearing out metabolic waste. Therapies like heat and massage are fantastic for this.
- Rebuilding Strength: Once the initial inflammation has settled, gentle and specific exercises help realign the tendon fibers and build up resilience, making the area less prone to future injury.
With this foundation, you have a clear roadmap for the practical strategies we're about to cover. Understanding the "why" behind each technique puts you in the driver's seat of your own recovery.
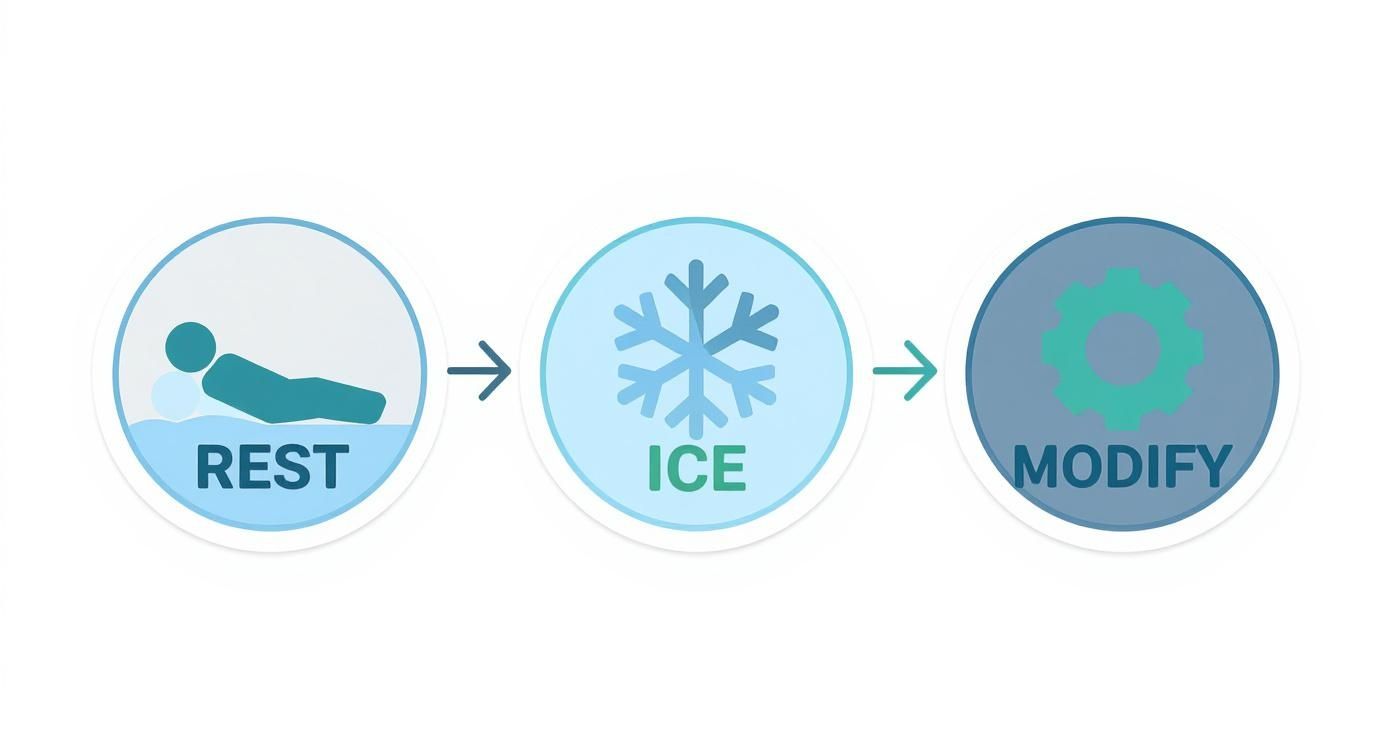
2. The First Steps to Recovery: Rest, Ice, and Smart Modifications
When you first feel that nagging, persistent ache of tendonitis, what you do right away really matters. Getting these first steps right sets the stage for a much smoother recovery. Think of it like this: the first 48 to 72 hours are all about calming down the initial flare-up and giving that overworked tendon the break it desperately needs.
Redefining Rest as “Active Recovery”
For years, the standard advice was to just stop moving entirely. We now know that's not the best approach. Complete immobilization can often lead to more stiffness and weakness down the road, making your comeback even harder.
A much better strategy is what we call active rest. This simply means you stop doing the specific things that hurt, but you don't stop moving altogether. Gentle, pain-free movement is actually great for maintaining circulation and flexibility. Instead of shutting down your life, you just get smarter about how you move. If typing is flaring up your wrist, you look for an ergonomic keyboard or take more breaks—you don't swear off computers forever. This approach keeps the rest of your body strong and conditioned while the injured area heals.
Applying Cold Therapy the Right Way
During the first two or three days of a new injury or a bad flare-up, ice is your best friend. Cold therapy works by constricting blood vessels, which is exactly what you want to do to reduce swelling and dull that sharp, throbbing pain. It’s a powerful and immediate way to get inflammation under control.
To get the benefits without risking skin damage, just follow these simple rules:
- Protect Your Skin: Never, ever put ice or a frozen pack directly on your skin. Always wrap it in a light towel or a T-shirt first.
- Time It Right: Leave the cold pack on the sore spot for about 15 to 20 minutes at a time. Any longer doesn't add much benefit and can be harmful.
- Repeat as Needed: You can reapply the cold pack every 2 to 3 hours throughout the day while the pain and swelling are at their worst.
This initial icing phase is all about managing that acute, angry inflammation. For a deeper dive into the timing and when to make the switch from cold to heat, you can explore this guide on when to ice and when to heat.
Key takeaway: Cold therapy is for the first few days to manage acute inflammation. Once that initial swelling and sharp pain have calmed down (usually after about 72 hours), you'll likely switch to heat to promote blood flow and healing. But starting with ice is the critical first step.
Smart Modifications for Daily Life
Healing isn't just about what you do for 20 minutes with an ice pack; it's also about what you don't do for the other 23 hours of the day. Pinpointing and adjusting the specific movements that are causing the repetitive strain is a total game-changer.
The table below offers some real-world examples to help you identify common triggers and find simple ways to give your tendons a break.
Modifying Daily Activities to Soothe Tendonitis
| Tendonitis Location | Common Aggravating Activities | Suggested Modifications |
|---|---|---|
| Elbow (Tennis/Golfer's Elbow) | Gripping tools, typing with bent wrists, lifting heavy objects with palms down. | Use ergonomic keyboards, take frequent typing breaks, and lift objects with your palms facing up to change the angle of force on the tendon. |
| Shoulder (Rotator Cuff) | Reaching overhead repeatedly, carrying heavy bags on one shoulder, sleeping on the affected side. | Use a step stool to avoid over-reaching, switch your bag to the other shoulder or use a backpack, and sleep on your back or unaffected side. |
| Knee (Patellar Tendonitis) | Running on hard surfaces, excessive jumping, deep squats with poor form. | Switch to softer running surfaces like trails or a track, incorporate low-impact cross-training (swimming, cycling), and focus on squat form. |
| Wrist (De Quervain's Tenosynovitis) | Repetitive thumb movements (texting), lifting children, wringing out clothes. | Use voice-to-text features, learn to lift objects with your palms up using your forearms, and use a wrist brace for support during tasks. |
| Achilles Tendon | Sudden increases in running mileage, wearing unsupportive footwear, tight calf muscles. | Gradually increase workout intensity, wear shoes with proper heel support, and incorporate regular calf stretches into your daily routine. |
By making these small but meaningful adjustments, you're actively reducing the daily wear and tear on your tendon. This creates the breathing room it needs to finally start healing.
Therapeutic Movement to Rebuild Stronger Tendons
After you’ve given the angry tendon a chance to calm down with rest and activity changes, movement becomes your most powerful tool for rebuilding. It sounds a little backward, doesn't it? Moving something that hurts? But the right kind of movement is exactly what your body needs to truly heal for the long haul.
Think of it this way: controlled, therapeutic exercise acts as a signal to your body. It says, "Okay, time to build!" In response, your body starts laying down new collagen—the tough, fibrous protein that tendons are made of. This isn't just about patching a hole; it's about methodically realigning the tendon fibers from a disorganized, frayed mess back into a strong, organized structure that can handle stress.
The steps below are the foundation that gets your tendon ready for this crucial rebuilding phase.
By resting, using cold therapy, and modifying your activities first, you create a calm, low-inflammation environment. This is the perfect stage for therapeutic movement to work its magic.
The Power of Eccentric Exercises
When it comes to tendon rehab, the gold standard is a specific type of movement called eccentric exercise. It’s a simple concept: it means you're lengthening a muscle while it's under load. This is the "negative" or lowering part of any lift.
Picture lifting a heavy box onto a shelf. The upward push is the concentric phase (the muscle shortens). Now, imagine slowly and carefully lowering that same box back down to the floor. That slow, controlled descent is the eccentric phase, and it’s a game-changer for healing tendons.
This very specific, controlled stress stimulates that healthy collagen remodeling without re-injuring the tissue. The research is incredibly strong on this. Study after study shows that structured eccentric exercise programs are a cornerstone of tendonitis recovery. In fact, across many common tendon issues, 60–90% of patients see significant improvement over several months with this approach. You can read more about the evidence supporting eccentric loading and why it's so effective.
Your At-Home Therapeutic Workout
Here are two classic eccentric exercises that target the most common sites of tendonitis. The golden rule is to move slowly, stay in complete control, and stop immediately if you feel any sharp pain. A little discomfort or muscle fatigue is normal, but sharp pain is a red flag.
1. Heel Drops for Achilles Tendonitis
This is a fantastic exercise for strengthening the Achilles tendon and the calf muscles that support it.
- Step 1: Stand on the edge of a stair or a sturdy step. Place just the balls of your feet on the surface and hold onto a wall or railing for balance.
- Step 2: Use both feet to rise up onto your tiptoes. This is the "easy" part.
- Step 3: Now, lift your uninjured foot completely off the step. All your weight should be on the injured leg.
- Step 4: Very, very slowly—take about three to five seconds—lower your injured heel down below the level of the step. You should feel a gentle stretch in your calf and Achilles.
- Step 5: Place your uninjured foot back on the step to help push you back up to the starting position. Repeat for 10-15 repetitions.
Pro-Tip: The whole point is to load the tendon only during the slow lowering phase. Don't use the injured leg to lift yourself back up. Let your good leg do that work to avoid re-aggravating things.
2. Wrist Extensor Curls for Tennis Elbow
This exercise targets the tendons on the top and outside of your forearm, which are the culprits in tennis elbow.
- Step 1: Sit comfortably in a chair. Rest your forearm on your thigh or a table with your palm facing down. Hold a very light weight—a can of soup or a 1-2 pound dumbbell is perfect to start.
- Step 2: Use your other hand to gently lift the hand holding the weight up toward the ceiling, so your wrist is bent back (extended).
- Step 3: Now, let go with your helping hand. Slowly lower the weight back down over a count of three to five seconds.
- Step 4: Once you're at the bottom, use your good hand again to lift the weight back to the top. Repeat for 10-15 repetitions.
By making these specific movements a part of your daily routine, you stop being a passive bystander. You become the one in charge of rebuilding your tendon, making it stronger and more resilient than it was before.
Using Heat and Massage to Speed Up Healing
Once the initial, sharp inflammation from a tendon injury starts to fade, you move into a critical new phase of recovery. This is where you can shift tactics. While ice was your best friend for the first few days, heat and massage now step in as powerful tools to genuinely accelerate the healing process.
https://www.youtube.com/embed/jvgIPja9qH4
Why Heat Therapy Works Wonders
After about 72 hours, applying gentle warmth to the sore tendon can make a world of difference. This technique, known as thermotherapy, basically supercharges your body's own repair crew. It works by triggering something called vasodilation—a fancy term for the widening of your blood vessels.
Imagine your body's circulatory system is a highway system. An injury creates a traffic jam, slowing the delivery of essential repair materials. Heat therapy acts like a traffic controller, opening up all the lanes. This allows a rush of oxygen-rich blood to flood the area, delivering the building blocks needed to repair those tiny, damaged tendon fibers and flushing out pain-causing waste. The result is reduced stiffness, soothed pain, and a better environment for healing. The science behind this is solid, and if you want to dive deeper, we've covered the many benefits of heat therapy for pain relief in another guide.
A great way to visualize this is to think of a cold rubber band. It’s stiff, brittle, and more likely to snap. But if you warm it up, it becomes flexible and resilient. Heat does the same thing for your tendons and muscles, making them more pliable and preparing them for the gentle movement that’s essential for recovery.
How to Safely Apply Heat for the Best Results
Applying heat is easy, but doing it the right way is key to getting all the benefits without any risk. The goal is a deep, soothing warmth, not scorching heat.
Here’s a simple, safe approach:
- Go for Moist Heat: A warm, damp towel, a soak in the tub, or a quality microwavable heat pack often works best. Moist heat penetrates more deeply than dry heat from a standard heating pad.
- Keep It Comfortably Warm: The temperature should feel pleasant and soothing, never hot. If you have to pull away, it’s too hot.
- Stick to Short Sessions: Keep the heat on for 15 to 20 minutes at a time. That’s the sweet spot for boosting blood flow without overheating the tissue. You can repeat this a few times a day, especially before you plan to do any gentle stretches.
Unlocking Recovery with Therapeutic Massage
Massage is the perfect partner to heat therapy. Once the acute inflammation is gone, it works by manually breaking down restrictive scar tissue and kick-starting the repair process. As a tendon heals, it can form adhesions—jumbled-up scar tissue that can cause long-term stiffness and weakness.
Gentle, therapeutic massage helps to realign these new collagen fibers into a strong, flexible, and functional pattern. One of the most effective techniques for this is called cross-friction massage. It involves applying deep, targeted pressure with a finger or thumb directly across the grain of the tendon, not along its length. This specific movement helps break up those sticky adhesions and stimulates the body to lay down healthier tissue.
And you don't always need a professional. Self-massage can be incredibly effective.
Example: Self-Massage for Tennis Elbow
- Find a comfortable seated position. Gently probe the outside of your forearm, just below the bony bump of your elbow, to find the most tender spot.
- Using the thumb of your other hand, apply firm, deep pressure directly on that spot.
- Slowly move your thumb back and forth across the tendon—imagine you’re strumming a thick guitar string.
- Keep this up for 3 to 5 minutes. It might feel a little uncomfortable (a "good hurt"), but it should never be sharply painful.
- Helpful Tip: Performing this massage after a 15-minute heat session can be even more effective, as the tissue will be warmed up and more receptive to the treatment.
You can also use simple tools like a massage ball for your Achilles tendon or a foam roller for larger areas. By making heat and massage a regular part of your routine, you take an active role in rebuilding a stronger, more resilient tendon that’s ready to get you back to doing what you love.
How to Fuel Your Recovery with Anti-Inflammatory Nutrition
What you eat is one of the most powerful natural ways to treat tendonitis from the inside out. Your diet isn't just passive fuel; it's an active tool that can either help calm inflammation or, unfortunately, make it worse. By consistently choosing the right foods, you give your body the essential building blocks it needs to repair damaged tendons and dial down the chronic inflammation that's holding you back.
Think of your body like a high-performance engine. When there's a problem, you wouldn't fill it with low-grade fuel and expect it to fix itself. You’d use premium, clean-burning fuel to help it run smoothly and support internal repairs. An anti-inflammatory diet does exactly that for your tendons.
Building Your Anti-Inflammatory Plate
Creating an anti-inflammatory eating plan is much simpler than it sounds. The main idea is to focus on whole, nutrient-dense foods that naturally fight inflammation and support tissue health. It’s all about consistently choosing foods that build you up.
Here are the key players to add to your grocery list:
- Omega-3 Fatty Acids: These are potent anti-inflammatory agents found in fatty fish like salmon, mackerel, and sardines. You can also find excellent plant-based Omega-3 sources in walnuts, chia seeds, and flaxseeds to support tissue repair.
- Antioxidant-Rich Foods: Think of antioxidants as your body's personal defense squad, neutralizing the harmful free radicals that contribute to inflammation. Load up on colorful fruits like berries and cherries, and dark leafy greens like spinach and kale.
- Vitamin C Powerhouses: Vitamin C is absolutely essential for producing collagen, the main protein that makes up your tendons. Great sources include citrus fruits, bell peppers, broccoli, and kiwi.
When you center your meals around these types of foods, you provide your body with a constant stream of healing nutrients. For even more ideas, check out our guide on reducing inflammation naturally through smart diet and lifestyle choices.
Key Nutrients and Supplements for Tendon Health
Beyond your daily meals, certain nutrients and natural compounds can offer more targeted support for tendon recovery. They can give your body an extra edge in the healing process.
One of the most well-studied natural compounds is curcumin, the active ingredient in turmeric. Its powerful anti-inflammatory properties have made it a focus of research for tendon health. For instance, a clinical trial found that a supplement containing Curcuma longa (turmeric) significantly reduced postoperative pain in patients recovering from tendon repair surgery. You can learn more about the research on curcumin for tendon healing to see how it works.
Other supportive nutrients include:
- Zinc: Crucial for tissue repair and protein synthesis. Find it in pumpkin seeds, lentils, and beef.
- Bromelain: An enzyme found in pineapple that helps reduce swelling and bruising.
- Glucosamine and Chondroitin: Often associated with joint health, they can also support the connective tissues in your tendons.
A Practical Example: A healing-focused meal could be a piece of grilled salmon (omega-3s) served with a large spinach salad (antioxidants) topped with walnuts (more omega-3s) and bell peppers (Vitamin C). This single meal delivers a powerful combination of anti-inflammatory and tissue-building nutrients.
Remember to always consult with a healthcare professional before starting any new supplement regimen to ensure it’s right for you. By making these smart, consistent dietary choices, you're not just eating—you're actively fueling a faster, more complete recovery.
Got Questions About Treating Tendonitis Naturally? We've Got Answers.
As you start exploring natural ways to heal your tendonitis, it's completely normal for questions to pop up. This whole process is about learning to listen to your body and making smart, consistent choices day after day. To help you feel more confident, we've put together some straightforward answers to the questions we hear most often.
How Long Does Natural Tendonitis Treatment Take to Work?
This is the big one, and the honest answer is: it really depends. Everyone's healing timeline is different, shaped by how severe the injury is, where it's located, and—most importantly—how consistently you stick with your recovery plan. Natural healing isn't a magic bullet; it's a gradual process of rebuilding.
For a mild, fresh case of tendonitis, you could start feeling a real difference within two to three weeks of dedicated care. But for those more stubborn, chronic tendinopathies that have been around for a while, you're looking at a longer journey—often somewhere between three to six months. Key therapies, like the eccentric exercises we talked about, usually start showing noticeable results after 6 to 12 weeks of consistent work.
The takeaway? Patience is your best friend here. The goal isn't just to silence the pain; it's to build a stronger, more resilient tendon for the long haul. If you've been diligent for four to six weeks and see zero improvement, that's a good sign it's time to check in with a healthcare professional.
When Should I Use Ice Versus Heat for My Tendonitis?
Getting the timing right for ice and heat is a game-changer. They do completely different jobs, and using the wrong one can actually set you back. Think of them as specialized tools for different stages of the healing process.
Here’s a simple way to remember it:
- ICE (Cold Therapy): Reach for ice in the first 48 to 72 hours after the initial injury or during a sudden, painful flare-up. The cold constricts blood vessels, which is great for taming swelling and numbing that sharp, angry pain. Just be sure to apply it for only 15-20 minutes at a time and never directly on your skin.
- HEAT (Thermotherapy): Save the heat for later, once that initial inflammatory phase has passed. Heat is your go-to for chronic, lingering stiffness and that deep, achy feeling. It boosts blood flow, helps relax tight muscles, and is perfect for warming up the area before you do any gentle stretching or exercise. One hard rule: never apply heat to a new, swollen injury.
Can I Still Exercise with Tendonitis?
Yes, absolutely—and you should! The key, however, is to be smart about it. Stopping all movement can actually make things worse, leading to more stiffness and weakness. The goal is to find that sweet spot between rest and therapeutic movement, a concept often called "active rest."
This means backing off any activity that causes sharp, immediate pain. But gentle, controlled movements are not only safe, they're essential for healing. This includes the specific therapeutic exercises in this guide, which are designed to load and strengthen the tendon without overloading it. You can also try low-impact cross-training, like swimming or cycling, to maintain your fitness while giving your tendon a break. The most important rule? Always, always listen to your body.
Are Braces or Splints Helpful for Natural Treatment?
Braces and splints can be fantastic supporting actors in your recovery plan, especially for tendonitis caused by repetitive strain, like tennis elbow or carpal tunnel. They work by providing a bit of external support, which changes the angle of pull on the tendon and reduces the load on the irritated area.
A counterforce brace for tennis elbow, for example, is worn just below the joint to absorb some of the forces traveling up your forearm before they can aggravate the tendon. They are best used as a temporary tool to get you through activities that you know cause irritation. You shouldn't wear them 24/7, though, because over-relying on them can lead to muscle weakness. Think of a brace as a helpful assistant, not a permanent fix—it’s most effective when paired with a solid strengthening and stretching routine.
For soothing, reliable warmth that supports your natural healing journey, explore the U.S.-made microwavable heat packs from SunnyBay. Designed for deep, penetrating heat, our products offer a simple, drug-free way to ease stiffness and accelerate recovery. Find your perfect heat therapy solution at https://sunny-bay.com.